
Replacing a fence in South San Francisco involves careful planning, from assessing your property and securing permits to selecting materials that withstand the local climate. Here's a quick breakdown of what to expect:
- Property Assessment: Check for damage, confirm property lines, and plan your layout. This ensures accuracy and avoids disputes.
- Permits & Regulations: South San Francisco enforces strict height limits and zoning rules. Most fences over 3.5 feet in the front yard or 6 feet on the sides/rear require permits.
- Material Selection: Coastal conditions demand durable options like vinyl, aluminum, or treated wood to resist corrosion and moisture.
- Budgeting: Costs range from $30–$55 per linear foot, with labor and materials split evenly. Terrain and wind conditions may increase expenses.
- Installation: The process includes site prep, old fence removal, and building the new structure. Projects on slopes or windy areas need additional adjustments for stability.
Proper planning and attention to detail ensure your fence lasts and complies with local rules. A-1 Fence Company offers expert guidance and efficient installations tailored to South San Francisco's unique needs.
Step 1: Evaluating Your Existing Fence and Property
Before diving into a fence replacement project, take the time to assess your current fence and property. This step can save you money, avoid disputes, and prevent unexpected issues during the process. By understanding the condition of your fence and the layout of your property, you'll be better prepared for the steps ahead. Start by inspecting for damage, verifying property boundaries, and mapping out your layout.
Inspecting Your Fence for Damage
Take a walk along the fence line and test each post with a firm push - any noticeable wobbling likely indicates a problem with the footing. Check the wood near the base by pressing firmly; if it feels soft or crumbles, rot may be taking hold.
If more than 30–40% of your fence is damaged, replacing the entire structure is often more cost-effective than making repairs. Don’t forget to check the gate. If it drags on the ground or doesn’t latch properly, it’s often a sign that the anchoring posts have shifted.
Here’s a quick guide to common symptoms and fixes:
| Symptom | Likely Cause | Recommended Action |
|---|---|---|
| Soft, crumbling wood at base | Rot or moisture damage | Replace affected posts or entire fence |
| Post wobbles when pushed | Failed footing or shallow installation | Reset post (if sound) or replace |
| Gaps between boards and posts | Warping or rusted fasteners | Repair isolated issues; replace if widespread |
| Extensive rust on steel/iron | Corrosion | Full replacement |
| Surface mold or mildew | High moisture levels | Clean and seal (if repairable) |
In areas like South San Francisco, wind damage is a common issue. If multiple posts lean consistently in one direction, it often signals that the entire fence system is failing.
Mapping Property Lines and Site Conditions
Don’t assume your existing fence is perfectly aligned with your property line. Fences can shift over time, and even a small error can lead to disputes. To confirm boundaries, hire a licensed surveyor, which typically costs between $300 and $800.
"Building even 6 inches over the property line means your neighbor can demand removal. Do not rely on existing fences, stakes, or assumptions." - Joey Lamb, Founder, PermitMint
If your property is on a slope, take note of elevation changes. This may require design adjustments and deeper footings - posts should usually be buried one-third to one-half of their above-ground height to handle soil movement.
Additionally, check your property deed or plat for any utility easements. These areas may have restrictions on fence construction. Once you’ve reviewed these details, mark utility lines to ensure safety before digging.
Measuring and Sketching the Fence Layout
After confirming your property boundaries, measure the total linear footage of the fence you plan to install. Pay attention to corners, gate openings, and any changes in grade. Sketch out key features, including gate locations and any obstacles.
Before digging, call 811 at least 2–3 business days in advance to have underground utilities marked.
"A request to your state's one-call service must be made a minimum of 2 business days before any digging begins." - Fence Advisors
For corners, use the 3-4-5 triangle method to ensure square angles. Measure 3 feet along one side, 4 feet along the perpendicular side, and confirm the diagonal is exactly 5 feet. This simple check helps prevent alignment issues. A detailed and accurate layout will serve as your roadmap for a seamless fence replacement project.
Step 2: Permits and Local Regulations
Before you start building, it’s essential to make sure your fence project complies with local rules. South San Francisco has specific guidelines about what you can construct, how tall it can be, and when you’ll need official approval. Below, we’ll cover zoning limits, permit applications, and neighbor communication requirements.
Local Zoning Rules and Height Limits
In South San Francisco, most fence projects require permits, and the rules depend on the type of property. Standard height limits without a permit are 42 inches (3.5 feet) for front yards and 6 feet for side and rear yards. Anything taller requires a permit or special exception.
| Fence Location | Standard Height Limit | Permit Required? |
|---|---|---|
| Front Yard | 3.5 ft (42 in.) | Yes, if over 3.5 ft |
| Side / Rear Yard | 6 ft | Yes, if over 6 ft |
| Pool Barrier | Minimum 5 ft (60 in.) | Always required |
| Corner Lots | Varies | May require engineering sight study |
Corner lots face additional scrutiny. If your fence might block a driver’s view at an intersection, the city could require a sight distance study by a licensed civil engineer. For exceptions allowing up to 2 extra feet in height, expect to pay around $2,600 for a Fence Height Exception in San Mateo County, with processing times ranging from 2 to 4 months.
"California fence permitting is more involved than most states. Between fire zone material restrictions, the Good Neighbor Fence Law, strict height limits, and city-specific design review processes, California homeowners need to plan further ahead." - Fence Advisors
Additionally, if your property lies in a Very High Fire Hazard Severity Zone, there may be restrictions on using wood or certain vinyl materials within 5 feet of any structure.
How to Apply for a Fence Permit
To apply for a permit, use the South San Francisco eTRAKiT portal at permits.ssfca.gov, where you can submit your application and track its progress online. For more complex projects, particularly commercial ones, visiting the South San Francisco Permit Center in person can help clarify requirements like setbacks and design reviews.
Your application should include a detailed site plan that outlines the fence’s location, height, materials, and distance from property lines. If your project is in a commercial zone, you might also need to submit a Design Review Application. Permit fees typically range from $75 to $175, though larger or more complex projects may cost more.
Neighbor Communication and Shared Fences
If your fence is on or near a shared property line, California’s Good Neighbor Fence Law (Civil Code §841) applies. This law presumes that both neighbors equally benefit from a shared fence and should split construction or replacement costs 50/50.
You’re required to provide your neighbor with 30 days’ written notice before starting work. The notice should include:
- A description of the project
- The estimated cost
- A proposed timeline
- Your suggested cost-sharing arrangement
If your neighbor prefers premium materials beyond a standard fence, they’re typically responsible for covering the additional cost.
"California law requires a 30-day written notice before starting work on a boundary fence, which serves as a formal step in preventing neighbor disputes and real property conflicts." - Zachary D. Schorr, Founding Attorney, Schorr Law
To avoid future misunderstandings, put everything in writing - materials, costs, and timelines. If disputes arise and your neighbor refuses to pay their share after proper notice and completed work, you can take the matter to small claims court. Following these steps ensures your fence project aligns with South San Francisco’s regulations and helps prevent conflicts down the road.
Step 3: Choosing Fence Materials and Designs
Once you've secured the necessary permits, it's time to pick materials and designs that can handle South San Francisco's coastal conditions. The salty air and foggy climate can shorten the lifespan of certain materials, so it's crucial to choose options that balance durability with your aesthetic goals.
Material Options and Weather Suitability
Each material has its own strengths when it comes to withstanding coastal challenges. Here's a breakdown of some popular choices for South San Francisco properties:
-
Vinyl: This is a low-maintenance option that resists warping, rust, and moisture. It’s also UV-protected, making it ideal for the area’s sunny and salty conditions.
"Vinyl fencing is especially popular here because it requires no maintenance and stands up to years of wind and salt air without needing paint or sealant." - Titan Gate
- Redwood: Naturally resistant to decay and pests, redwood is a trusted option for fencing. However, in coastal zones, it requires staining or sealing every 2–3 years to maintain its durability.
- Aluminum: Known for being rust-proof and durable, aluminum works well for pool barriers and open-view areas, especially in the misty conditions near the bay .
- Ornamental Iron: If security is a priority, ornamental iron offers a strong yet stylish solution. To withstand the damp air, it must be pre-galvanized and powder-coated.
- Chain Link: This is an economical choice. When galvanized or vinyl-coated, it resists corrosion effectively.
Additionally, wind is a major consideration in areas like Oyster Point or Terrabay, which experience frequent gusts. For these locations, fences should be built with concrete footings at least 24 inches deep and reinforced posts for added stability . If your property is in a Very High Fire Hazard Severity Zone, noncombustible materials like metal or masonry are recommended, especially within 5 feet of any structure.
Common Fence Design Styles
Your fence design should not only complement your home’s style but also meet functional needs. Here are a few popular designs in South San Francisco:
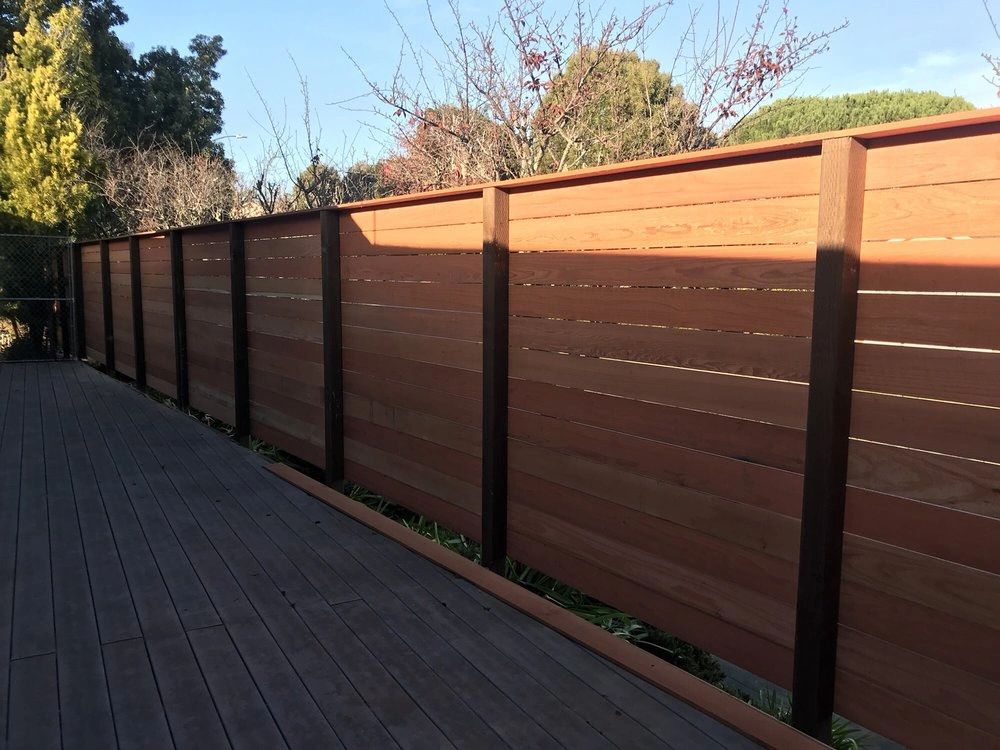
- Horizontal Plank Fences: Often made with 1×4 or 1×6 redwood boards, this modern style is a favorite among contemporary homes.
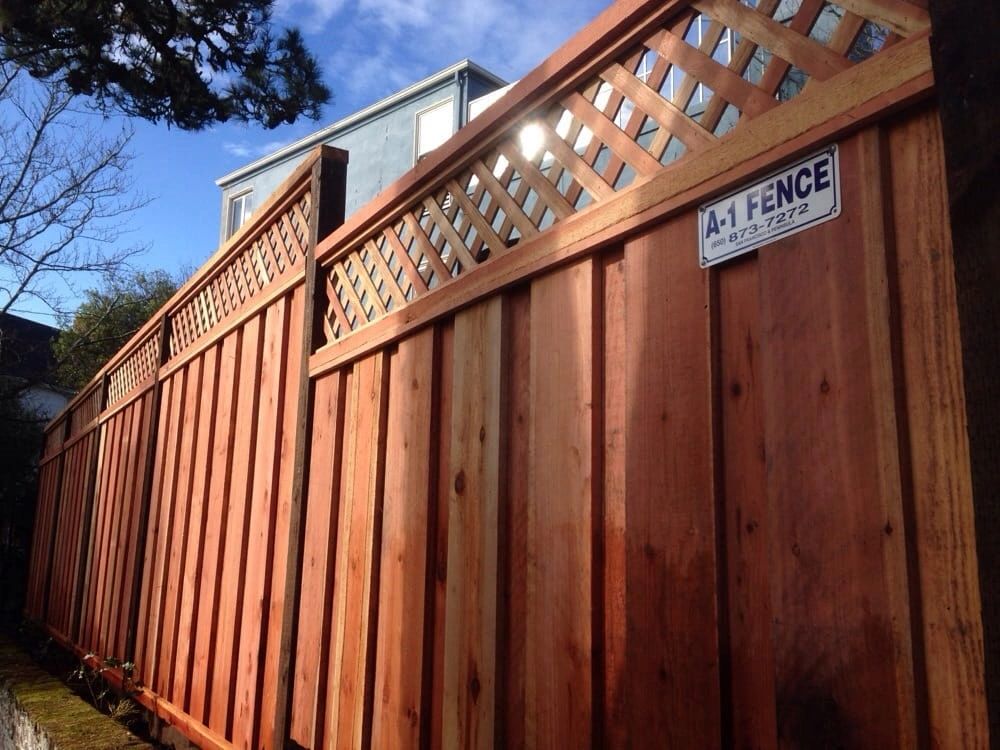
- Board-on-Board (Good Neighbor) Fences: Perfect for shared property lines, this design looks identical on both sides, avoiding disputes over which side has the "finished" look.
- Stepped or Racked Fences: For sloped properties, stepped fences create a stair-step effect, while racked fences follow the slope for a smoother top line. These are especially useful for hillsides in areas like Terrabay.
Once you’ve settled on a design, compare material costs and longevity to finalize your decision.
Cost and Maintenance Comparison by Material
Here's a side-by-side look at the typical costs, lifespans, and maintenance levels for different materials in South San Francisco:
| Material | Cost per Linear Foot | Lifespan | Maintenance Level | Best For |
|---|---|---|---|---|
| Chain Link | ~$21 | 15–20 years | Low | Utility, boundaries |
| Wood (Cedar/Redwood) | ~$34 | 15–20 years | High (seal every 2–3 yrs) | Residential privacy |
| Vinyl | ~$43 | 20–30 years | Very low | Low-maintenance privacy |
| Aluminum | ~$44–$61 | 20–30 years | Low | Pool barriers, open views |
| Composite | ~$68–$102 | 25–50 years | Very low | Premium long-term value |
While wood is initially more affordable, it requires frequent upkeep - especially in the foggy, salty air that accelerates wear. Vinyl, though about 25% more expensive upfront, offers a nearly maintenance-free lifespan. Composite materials, while pricier, last the longest and are a great option for those looking for a long-term investment.
"Wood is usually the least expensive but generally requires the most maintenance. Vinyl fencing is a bit more expensive than wood, but requires little maintenance.
Regardless of the material you choose, always use hot-dipped galvanized or stainless steel fasteners. Standard hardware can corrode quickly in the Bay Area's marine air, leading to rust streaks and structural issues over time. These small details are key to ensuring your fence looks great and stands the test of time.
Step 4: Budgeting for Fence Replacement
Once you’ve chosen your materials and design, it’s time to figure out the costs. This step ties directly to the decisions you made earlier, helping you create a clear financial plan.
What Goes Into the Total Cost
Replacing a fence involves several cost components, each contributing to the final price:
| Cost Component | Estimated Price Range |
|---|---|
| Old fence removal | $3 – $7 per linear foot |
| Permit fees | $200 – $600 |
| Site prep / grading | $500 – $1,500 |
| Single walk-through gate | $400 – $1,200 |
| Decorative elements (caps, etc.) | $300 – $1,200 per feature |
Breaking down these costs early can help you avoid surprises during installation.
Labor and materials typically make up equal portions of the total expense. In areas like the Bay Area, labor costs are $25–$35 per linear foot, much higher than the national range of $15–$20 per linear foot. For a standard 150-foot yard, the difference adds up quickly.
"California's labor costs run $25–$35 per linear foot compared to $15–$20 nationally. The Bay Area and Los Angeles see the highest rates." - Adam Lewis, Poseidon Remodeling
Typical Cost Ranges in South San Francisco
For residential projects, the cost to install a fence in South San Francisco typically falls between $30–$55 per linear foot. Replacing a 150-foot backyard fence will likely cost between $4,500 and $8,250, depending on the materials you choose. However, local factors like terrain and wind conditions can push these numbers higher.
For example, hillside areas like Terrabay often require stepped or racked fencing and deeper footings, which can increase costs by 15%–30% compared to flat-lot installations. Similarly, homes on narrow lots near downtown may face higher costs due to limited equipment access. If your property is in a high-wind zone, such as near Oyster Point, reinforced post engineering may also be necessary.
Budgeting Tips for Homeowners and Businesses
- Plan for a 20%–30% contingency. This extra cushion covers unexpected expenses like rocky soil, permit changes, or additional site preparation.
- Book during the off-season. Many contractors offer discounts of 10%–25% between November and February when demand is lower.
- Save on labor by prepping the site yourself. Clearing the fence line can reduce costs.
- Stick to standard heights. A 6-foot privacy fence avoids the extra fees and structural adjustments required for taller installations.
If your fence is on a shared property line, California's Good Neighbor Fence Law (Civil Code §841) allows you to split the cost 50/50 with your neighbor. Just remember to provide them with 30 days' written notice before starting construction.
Step 5: The Fence Replacement Process with A-1 Fence Company
With your budget set and materials selected, the next step is all about turning plans into reality. A-1 Fence Company uses a clear, three-phase approach - Pre-Construction, Construction, and Post-Construction - to ensure projects stay on track and within budget.
Site Preparation and Layout
Before any digging begins, the crew takes several key steps to prepare the site. They confirm property lines, mark post locations, and contact 811 for utility locates at least two business days in advance. Utility markings are typically valid for 10 days, so timing these tasks is crucial. The spacing of posts depends on the material being installed: wood and vinyl posts are generally spaced 6–8 feet apart, while chain link posts can be spaced up to 10 feet apart. For properties on slopes, the team decides whether a stepped or racked design will work best.
Removing the Old Fence and Clearing the Site
Once the layout is finalized, the crew removes the existing fence. This includes dismantling posts, panels, and hardware, followed by clearing away debris. For materials like vinyl, which are recyclable, disposal is handled according to local regulations. Customers on platforms like Nextdoor often praise A-1 Fence Company for their care in maintaining clean work areas and respecting property boundaries. To help streamline the process, homeowners can clear the area of items like planters, furniture, or toys ahead of time, reducing the risk of accidental damage.
Installation and Final Inspection
After preparing the site, the crew digs post holes and pours concrete footings. For a standard 6-foot privacy fence, footings are typically 30–36 inches deep. In areas prone to high winds, such as Oyster Point or hillside properties, deeper footings and reinforced posts may be required for added stability. To ensure the posts remain secure, the concrete is allowed to cure for 48–72 hours before attaching rails and panels.
Once the panels are installed and gates are in place, A-1 Fence Company performs a thorough walkthrough with the homeowner. This final inspection checks for straight posts, even spacing, and properly functioning hardware.
As the company explains:
"The last step in any build... includes site cleanup, systems training, final inspections and move-in coordination. After completion, we have a final walkthrough to ensure your complete satisfaction." - A-1 Fence Company
For most residential projects, professional crews can install 100–150 linear feet of wood privacy fencing in a single day. This means standard installations are often completed within one to two days. Their efficient process ensures your fence is not only completed quickly but also meets all necessary structural standards.
Conclusion: Working with A-1 Fence Company on Your Fence Replacement
Replacing a fence in South San Francisco involves more than just picking materials - it’s about careful planning, from evaluating your property to navigating permits and selecting the best options for durability. This step-by-step approach ensures your fence stands the test of time and avoids potential headaches down the road. A-1 Fence Company brings this level of expertise to every project.
With over 43 years of experience, an A+ rating from the Better Business Bureau, and recognition as a Nextdoor Neighborhood Favorite multiple times, A-1 Fence Company has a track record you can trust.
Whether you’re considering sturdy redwood, low-maintenance vinyl, or stylish ornamental iron, A-1 Fence Company offers support at every stage - from design to installation. Their pre-construction process includes personalized design collaboration and active budget management, ensuring your project stays on track and within your means.
For personalized advice or a custom estimate, get in touch with A-1 Fence Company at a1fencesf@gmail.com or call their Peninsula office. They’re available to assist you Monday through Friday, 9:00 AM to 5:00 PM.
FAQs
How do I know if I need a full fence replacement?
If more than half of your fence is damaged, over a third of the posts are rotting at or below ground level, or if the damage is extensive - like a leaning structure - it’s best to go for a full replacement. You should also think about replacing your fence if it’s over 15 years old, the cost of repairs is more than 50–60% of what a new fence would cost, or if you’re looking to upgrade the materials or change its style.
What documents do I need to get a fence permit in South San Francisco?
To obtain a fence permit in South San Francisco, you’ll need to complete and submit a Building Permit Application through the city’s online portal. Be prepared to include key documents like a scaled site plan that outlines property boundaries, the proposed fence location, and any required setbacks. Additionally, you’ll need elevation drawings detailing the fence’s height, materials, and footing specifics.
If your property falls under an HOA, make sure to include an HOA approval letter. For residential projects, you may also need preliminary clearance from PG&E, depending on the circumstances. Double-check all requirements to ensure a smooth application process.
Which fence material holds up best to South San Francisco fog and salt air?
Powder-coated aluminum works perfectly in South San Francisco thanks to its ability to withstand moisture, rust, and rot, even in salty air. Vinyl is another hassle-free choice that avoids corrosion, though it may not hold up as well in strong winds. For top-tier durability, marine-grade stainless steel (316) stands out with its exceptional resistance to salt exposure. Meanwhile, composite materials offer the charm of wood without the maintenance headaches that come with traditional timber.