
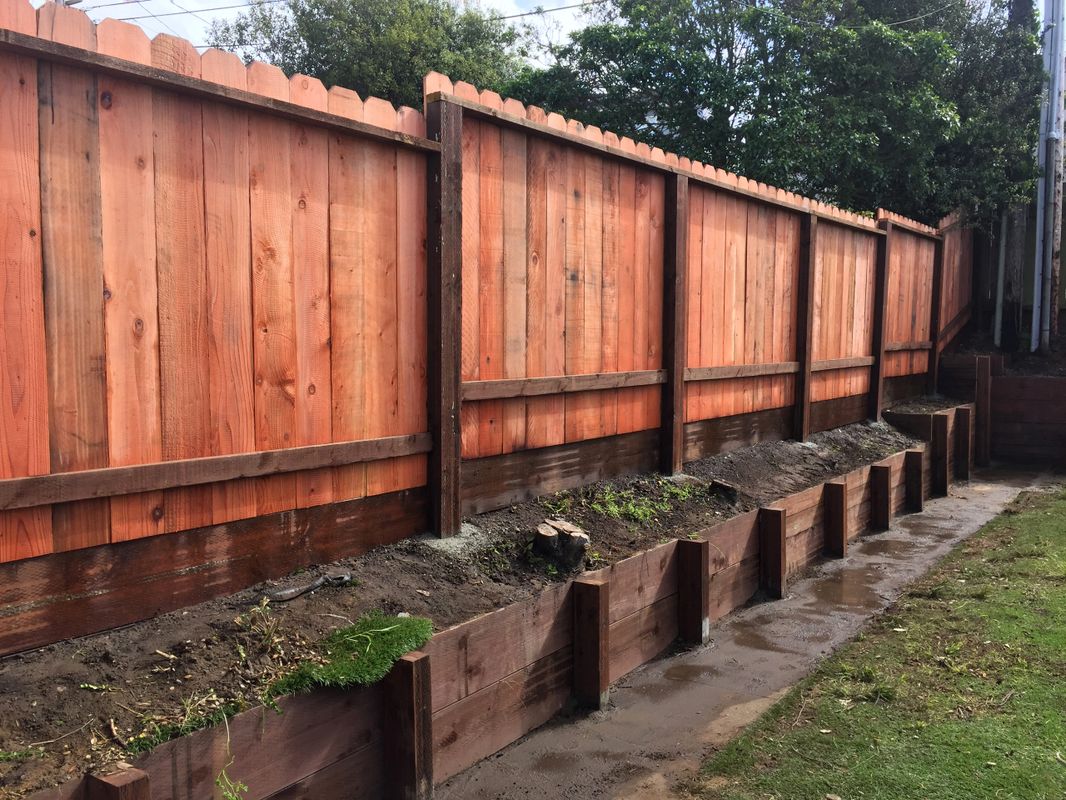
Installing a wood fence in South San Francisco is a smart way to improve privacy, security, and curb appeal. However, the local coastal climate - marked by fog, humidity, and salty air - can accelerate wood deterioration. Choosing the right materials and following proper installation steps can help your fence last decades.
Key Takeaways:
- Best Materials: Redwood (20–40 years lifespan), Cedar (15–30 years), and Pressure-Treated Pine (10–25 years).
- Costs: Installation ranges from $1,848 to $4,706, averaging $3,277.
- Permits: Required for fences taller than 3 feet in front yards or 6 feet in side/rear yards, costing $100–$490.
- Challenges: Moisture, salt air, and UV exposure can cause rot, warping, and fading.
- Maintenance: Regular sealing (every 2–5 years) and trimming nearby vegetation are crucial to protect the wood.
Pro Tip: Use stainless steel fasteners and seal every edge of the wood to guard against rot and rust in humid conditions.
Read on for a detailed breakdown of materials, installation steps, and tips to ensure your fence withstands South San Francisco’s climate.
Wood Materials for South San Francisco Fences
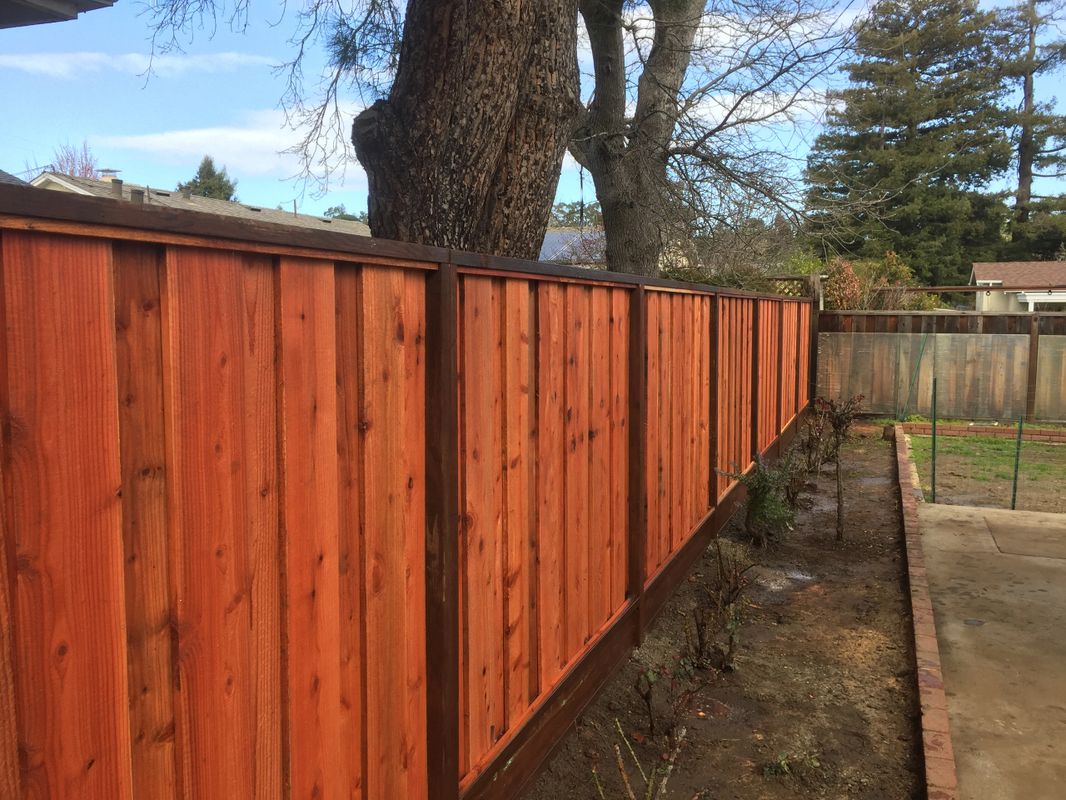
When building fences in South San Francisco, the local climate plays a big role in material selection. Fog, humidity, and coastal salt can take a toll on wood, so choosing the right type is essential. Redwood, cedar, and pressure-treated pine each offer their own strengths, costs, and maintenance requirements.
Redwood stands out for its natural durability. Thanks to its high tannin content, it resists moisture, decay, and insects without needing heavy chemical treatments. Plus, being locally sourced from Northern California helps keep transportation costs in check. Redwood fences can last anywhere from 20 to 40 years with minimal maintenance, requiring resealing about every 4 to 5 years. Its warm reddish-brown color and resistance to warping make it a strong choice for coastal environments.
Cedar offers solid performance at a more affordable price. Its natural oils provide protection against rot and insects, even in damp conditions.
On average, cedar fences last 15 to 30 years. If left untreated, they develop a silvery-gray patina over time. To keep them looking their best, regular cleaning and resealing every 2 to 3 years is recommended.
Pressure-treated pine is chemically treated to resist rot, making it a cost-effective option for damp environments. However, it’s more susceptible to warping and cracking when exposed to fluctuating humidity. These fences typically last 10 to 25 years, but they require consistent sealing to maintain their appearance and durability. The wood's yellow-green tint often benefits from staining for a more uniform finish.
Wood Material Comparison Table
Here’s a quick comparison of the key factors for these wood types:
| Wood Type | Cost Per Linear Foot | Maintenance Frequency | Lifespan | Performance in Fog/Humidity |
|---|---|---|---|---|
| Redwood | $8–$12 | Every 4–5 years | 20–40 years | Excellent – tannin-rich |
| Cedar | $2–$4 | Every 2–3 years | 15–30 years | Good – naturally rot-resistant |
| Pressure-Treated Pine | $1–$3 | Frequent/Annual | 10–25 years | Fair – prone to salt/moisture wear |
With these details in mind, you're ready to dive into the preparation steps for fence installation.
Preparation Steps Before Installation
Permits and Property Line Verification
Before starting any fence project, it's crucial to sort out permits and confirm property boundaries. In South San Francisco, you'll need a building permit for fences taller than 3 feet in the front yard or 6 feet in side or rear yards [4, 11]. Permit fees generally range from $100 to $490. Many fencing contractors can handle this paperwork for you, making the process smoother and ensuring all local rules are followed.
To establish your property lines accurately, hiring a licensed surveyor is your best bet. For properties under an acre, surveys typically cost between $400 and $600. A surveyor will locate and, if necessary, reset boundary markers (also called "pins"), minimizing the risk of encroaching on your neighbor's land. Also, keep in mind that California's Good Neighbor Fence Law (Civil Code Section 841) mandates providing neighbors with 30 days' written notice before starting construction on shared boundary fences.
Site Clearing and Leveling
After securing permits, clear the fence line of obstacles like trees, shrubs, or old fencing. Removing a tree costs about $750 per tree on average. If you're replacing an existing fence, dismantling and disposal costs range from $290 to $740, or roughly $3 to $7 per linear foot. Don't forget to call 811 before digging - this free service marks underground utility lines to prevent accidents and fines.
If the ground is uneven, you may need to grade the area to create a stable surface for the fence. Land grading costs vary, starting at $390 for smaller areas and going up to $5,880 for larger jobs. This step is especially important in South San Francisco, where hilly terrain can make fence installation tricky. Once the site is cleared and leveled, you can move on to marking post locations and digging.
Post Location Marking and Hole Digging
Mark where each post will go by placing stakes every 6–8 feet and using string to ensure alignment. Then, dig holes 24–30 inches deep (about one-third the post's length) and 12 inches wide. Add a 6-inch gravel layer at the bottom to improve drainage. This gravel is especially helpful in South San Francisco's foggy, humid conditions, as it prevents water buildup and reduces the risk of wood rot. With the post holes ready, the next step is setting the posts in concrete.
The Wood Fence Installation Process
Setting Posts in Concrete
Once the holes are dug and filled with gravel, the next step is setting the posts. Place each post in its hole, brace it with angled temporary supports, and use a level to ensure it stays perfectly vertical while the concrete cures (this typically takes 24–48 hours). Mix the fast-setting concrete according to the instructions on the bag, then pour it around the post, filling the hole completely. This solid base is particularly important in regions with strong coastal winds.
It’s crucial to keep the posts plumb throughout the curing process. For standard 4×4 posts, one 60-pound bag of concrete per hole is usually enough. However, gate posts, which bear more weight, require 6×6 lumber and two bags of concrete per hole. Once the concrete has fully set, you can move on to building the fence framework by attaching the rails and panels.
Attaching Rails and Panels
With the posts securely in place, the next step is attaching three horizontal rails to form the framework. Position the top rail 7–8 inches down from the top of the post, the bottom rail 7–8 inches above the ground, and the middle rail centered between them. Each rail should meet at the center of each post. Use a circular saw to cut the rails to the correct length, being careful to avoid cutting into the posts. Secure the ends of each rail with two or three 16d nails or 3.5-inch galvanized ring shank nails.
After the rails are installed, attach the vertical pickets. To ensure a consistent top line, especially on sloped ground, run a string line between the end posts. Begin by installing the first picket, then follow with the rest, checking that each one is level. For a three-rail fence, each picket should be secured with six nails - two at each rail. Place the nails about one inch from the edges and avoid knots to reduce the risk of splitting. Leave a 1–2 inch gap between the bottom of the pickets and the ground to minimize moisture damage. Pickets can be installed tightly together, as they will naturally shrink over time, creating small gaps. Once the panels are in place, you can shift your attention to properly installing the gate(s) for full functionality.
Installing Gates and Hardware
When installing gates, use 6×6 posts on the hinge side - or on both sides for double gates - to handle the added weight. To ensure alignment with the fence line, run a mason string line through the gate opening while setting the posts.
Start by attaching the hinges to the gate frame, then mount the gate to the post. Next, install the latch hardware on the opposite side. For single gates, keep the width between 4 and 5 feet to prevent sagging, unless a metal gate frame is used. Make sure to use galvanized hardware, such as ring shank nails or exterior screws, to resist rust - especially in humid areas like South San Francisco. To protect the gate posts from moisture, apply silicone caulk to the tops before installing post caps. In the San Francisco area, adding a standard 4-foot-wide gate typically costs between $200 and $590.
Installation Timeline and Costs
Here’s a closer look at how long it might take to install your wood fence in South San Francisco, along with a breakdown of costs based on materials, height, and other factors.
How Long Installation Takes
From the initial estimate to the final installation, the entire process typically takes 1–4 weeks. This includes tasks like securing permits, waiting on HOA approvals, and scheduling the installation crew. The actual physical installation of 100–200 linear feet of fencing usually takes 1–3 days, with an additional 24–48 hours needed for concrete curing on a 150-foot project.
However, local conditions can affect the timeline. For instance, South San Francisco’s coastal fog and humidity may slow down the drying process for staining or sealing. To avoid delays, plan your project during milder weather. Also, make sure there’s an 18-inch clear path along the fence line to help the crew work more efficiently.
Cost Breakdown by Wood Type and Height
Once your schedule is set, the next big consideration is cost. Wood fence installations in the area typically range from $1,848 to $4,706, with an average of $3,277. The final price depends on the type of wood and the height of the fence you choose.
- Pressure-treated pine: $15–$25 per linear foot (installed)
- Cedar: $30–$50 per linear foot
- Premium redwood: $40–$60+ per linear foot
Here’s a quick look at how height affects costs:
| Fence Height | Estimated Cost per Linear Foot (Installed) |
|---|---|
| 4-Foot Privacy | $22–$31 |
| 5-Foot Privacy | $24–$33 |
| 6-Foot Privacy | $27–$36 |
| 8-Foot Privacy | $32–$47 |
Taller fences, especially those over 6 feet, require more materials and labor, which can increase costs by 20% to 30%. Labor rates in the San Francisco area range from $10–$29 per linear foot or $25–$59 per hour. Don’t forget to factor in California’s 8.63% sales tax, which applies to both materials and labor.
Other Factors That Affect Cost
Several site-specific factors can also influence your total costs. For example:
- Permits: Fees vary based on your location.
- Sloped properties: Land grading may cost $980 to $3,160, depending on the slope’s severity.
- Seismic zones: California’s earthquake-prone areas may require deeper post holes and stronger bracing, adding 15% to 20% to the total cost.
- Rocky soil or tree roots: These can slow down post hole digging and may require specialized equipment.
- Custom features: Lattice toppers can add $2 to $12 per linear foot, while a standard 4-foot-wide gate costs $200 to $590 to install.
- Staining or sealing: Professional services cost $3.50 to $13 per linear foot, offering protection against the area’s humid coastal conditions.
Local Challenges and Maintenance Tips
Once you're familiar with installation timelines and costs, it's time to address the specific challenges posed by South San Francisco's environment. The coastal conditions here can take a toll on wood fences, with fog, salt air, and humidity being the main culprits. By understanding these factors and following a few maintenance strategies, you can help your fence endure for decades instead of just a handful of years.
Managing Fog and Humidity
South San Francisco's marine climate subjects wood fences to constant cycles of wetting and drying. This can lead to issues like rot, warping, and UV damage, especially for common woods like pine or Douglas fir, which may only last 2–3 years without proper care.
One of the most vulnerable areas is where the fence posts meet the soil, as this is where moisture damage often begins. To protect your fence, seal every edge of the wood - especially the end grains, which soak up moisture the fastest. A penetrating sealer or thinned epoxy works well for this purpose. Keeping bushes and trees trimmed back from the fence line can also help by reducing trapped moisture and preventing mildew growth. Additionally, because salt air can corrode standard hardware, opt for stainless steel fasteners to avoid rust and maintain structural integrity.
Beyond addressing moisture, ensuring the fence's structural strength is equally important.
Preventing Sagging and Structural Problems
A solid installation is key to avoiding sagging and other structural issues. Fence posts should be set in concrete footings at the right depth to handle shifting soil and withstand wind loads. For South San Francisco's damp and sloped terrains, using galvanized or powder-coated steel posts instead of wood can eliminate concerns about post rot.
If you choose redwood, you're in luck - it’s naturally more stable and less prone to twisting or bowing in fluctuating humidity compared to other softwoods. Regular inspections are vital; check annually for cracks or peeling, and repair any exposed areas promptly. Also, make sure there’s enough air space between the fence and nearby structures to prevent moisture from getting trapped.
Sealing and Staining for Longer Life
Proper sealing and staining are essential to protect your fence from the coastal elements. Before resealing, clean the wood thoroughly to ensure the sealer adheres properly and to prevent mold growth.
Look for stains or sealers with UV protection to slow down the graying caused by the sun and salt air. If you prefer professional help, sealing services typically cost between $3.50 and $13 per linear foot. While this might seem like an investment, it can significantly extend your fence's lifespan in South San Francisco's harsh conditions.
Conclusion
Installing a wood fence in South San Francisco requires careful planning, the right materials, and ongoing care. With the area's coastal conditions - fog, humidity, and salt air - it's crucial to choose materials and installation techniques that can endure these challenges.
Start by verifying your property lines and obtaining necessary permits. Using the methods discussed earlier, such as proper post-setting and selecting durable hardware, ensures your fence is built to last. Regular upkeep is just as important: applying a UV-protective sealer every 2–3 years helps combat cracking and graying, while trimming nearby vegetation reduces moisture that can lead to fungal issues. By following these steps, you can enjoy a fence that performs well in South San Francisco's demanding climate.
For over four decades, A-1 Fence Company has been a trusted name in the San Francisco Bay Area. This family-owned business, located at 363 El Camino Real, Ste 218, South San Francisco, CA 94080, has earned a 4.5-star Yelp rating from 202 reviews and an A+ rating with the Better Business Bureau. Their team specializes in navigating the unique challenges of coastal environments, offering expert guidance on everything from material selection to professional installation.
Reach out to A-1 Fence Company today for a custom quote and let their experienced team help you create a wood fence that’s built to last.
FAQs
Which wood is best for fog and salty air?
Western Red Cedar stands out as a top choice for foggy, salty environments. Its natural resistance to decay and ability to endure humid coastal conditions with little warping make it a dependable and long-lasting option for these challenging climates.
How do I avoid property line disputes?
When planning to install a wood fence in South San Francisco, it's essential to avoid property line disputes. Start by verifying your property boundaries through official documents like surveys or title deeds. If there's any uncertainty, hiring a professional surveyor can provide clarity.
It's also a good idea to discuss your plans with your neighbors and come to an agreement on the exact location of the fence before moving forward. Open communication can prevent misunderstandings and foster good relations. Additionally, make sure you're familiar with local regulations. Working with a contractor who knows South San Francisco’s specific rules can help ensure everything is done correctly and within legal requirements.
How often should I seal my fence here?
It’s a good idea to seal your wood fence every 2 to 3 years. This helps shield it from moisture and UV damage, which can take a toll over time. In South San Francisco’s climate, where weather conditions can be unpredictable, regular sealing plays a key role in keeping your fence strong and lasting longer.